Saturday, March 29, 2014

Sewing Doll Clothes Part I

I think it's strange that I haven't enjoyed sewing doll clothes as much as I thought I might.  I love to sew clothes, I loved sewing this doll.  I will chalk this up, as I always do with sewing, to experience and try to forget the things I've spent hours on that ended up in the trash.

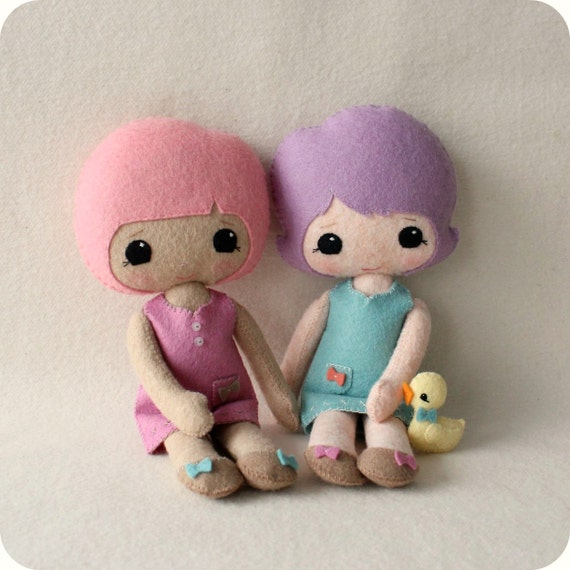
Frustrations aside, I think I've come up with a reasonable first outfit.  I didn't match plaids.  Oops.  I joined two pieces of fabric for the skirt instead of doing the better and more symmetrical three - so there is an ugly seam right in the front, of course.

I did dust the cobwebs from the section of my brain that knows how to do heirloom sewing, though!  I am so happy with the pintucks* and embroidery on the slip (which I made because I cut the dress too short).

I'm hoping the next outfit will be a more peaceful and rewarding sewing experience.


*pintucks are so easy to do!  You need a double needle and a ruler or a pintuck foot (the foot keeps each tuck evenly spaced, the twin needle makes the "tuck").

  • Thread your machine per your instructions for a twin needle
  • Use a ruler to mark your pintuck lines (or mark the first one and use a pintuck foot)
  • Sew!
  • Press.  Having a wooden clapper helps make the tucks even crisper.

Make something beautiful (time learning is beautiful, too)!
Jen

Wednesday, March 26, 2014

Doll Making: Arms, Legs, and Undercloths

I'm finished with Claire!  She's turned out so lovely I'm amazed.  I know there are many little flaws - seams I didn't sew quite straight, embroidered features that aren't quite symmetrical...but I guess they add to her charm.


I couldn't bring myself to post her naked, so I had to make her some underthings.  I may have made doll clothes as a girl, but it's been long enough that it's like I'd never done it before.


I checked out a book from the library The Doll's Dressmaker by Venus Page. 


This book has a plethora of patterns for dolls of all sizes and it shows ways to modify the basic pattern pieces to create many different styles of clothing.  The problem is, it's not very logically organized and the sewing instructions are pretty much non-existent.  I purchased a Butterick pattern that looked to have similar basic clothing styles so I could use the instructions from that pattern to help me with the construction of the patterns from the book.

The Butterick pattern I used is 6001 - it's sized for 18 inch dolls.
http://butterick.mccall.com/b6001-products-47979.php?page_id=391

 I used the bodice pattern from it and changed it to a front closure instead of a back closure.  I had to take it in at the sides and sew a little pleat in the back to help it fit my doll (she only stands about 16 inches).

 Here's a shot of her next to my quilting ruler so you can get an idea of her size.  Just about 16" high.


Her pants are made from a pattern from the Doll's Dressmaker book.  Pants are really easy, so instructions weren't necessary.

I have some beautiful dresses in the works - I can't wait to show them to you!

Make something beautiful!
Jen


Saturday, March 22, 2014

Doll Making Continued - Doll Hair

I've finished the embroidery and hair on Claire.  The work is slow and particular, but I really enjoy it.  It's rewarding to see her take shape.

I chose a more elaborate hair style than maybe I should have for my first doll-hair application experience.  I wanted this style because I love little ringlets - it reminds me of the Betsy-Tacy books by Maud Hart Lovelace that I read as a little girl.  I was enchanted by the description of Tacy's bright red ringlets.  How I wished I had those instead of my plain brown ordinary hair!
 These two photos are the "in process" shots:
  • The yarn I used is Berroco Lustra - a blend of 50% Peruvian wool and 50% Tencel.  It's very soft and has a lovely sheen.  The color is Rodin Bronze.  
  • There is a dowel rod secured around her torso with a rubber band - this is so the hair loops all end up roughly the same length.  
  • I put pins down the edge of her part line spaced about 1/4" apart and loop the the thread around the pin and then around the dowel and back up again.  
  • Then I sewed each loop securely to her head with matching heavy duty thread.

Jill Hamor, author of Storybook Toys and my resource for this doll, has an excellent tutorial on her website as well as in her book.

Once I had the loops attached I took sections and sewed them to her head and then twisted the ends, folding them up to double them and then sewed it to her head again.  It took a really, really long time.


Here is her hair completed from all angles.  If I do this hair style again, I will make it longer - it's a bit shorted than I wanted.


Next up arms and legs.  I think I said that last post.  The hair took longer than I thought.

Make something beautiful!
Jen

Sunday, March 16, 2014

Doll Making - Claire

I set a goal at the beginning of this year to sew everyday.  So far I haven't missed a day.   I'm amazed at how that simple goal has improved my productivity.  So why, then, haven't I had any completed projects to post in several weeks?

Well, my latest project is a doll.  A doll that involves a large process of learning, practicing and perfecting techniques before assembling my "real" doll.

I have been collecting dolls since I was a little girl.  I have a beautiful collection that, alas, has been stored away in boxes since my son was born since he took over the room I used to have for them.  They are also all porcelain - not a very child friendly material.

When I saw this book,
 http://www.amazon.com/Storybook-Toys-Projects-Puppets-Softies-ebook/dp/B00B7Y3B36/ref=sr_1_1?ie=UTF8&qid=1395010049&sr=8-1&keywords=storybook+toys
I felt my romance with dolls rekindle and I've been planning and practicing so I could make my own beautiful vintage inspired cloth doll.

I'm sharing an "in process" photo.  This is Claire.  She's a passionate Scottish girl with auburn hair and hazel eyes. 


I have loved every part of constructing her so far, from slowly stitching the tricky curves of her head and face, to patiently stuffing and stuffing and shaping and stuffing her head and body - it feels like sculpting.  I used real wool to stuff her.  It has a very sweet lanolin smell and packs very tightly for nice shaping.


The techniques for embroidering her face are excellent.  I highly recommend this book for it's excellent and detailed instructions.

I hope to have more progress photos in a few days (like arms and legs :))

Make something beautiful!
Jen


Tuesday, March 4, 2014

The Dog Ate My Homework

Our dog, Dakota, actually does eat my son's homework - and in some cases his "book-in-a-bag."  Book-in-a-bag is a cute drawstring backpack that the children take home with a book to read and a reading comprehension worksheet to do.  They bring their complete work back to school and get another book-in-a-bag.

The dog misses the boy during the day and I think he chews on his things to express his discontent.
Anyhow, I had to confess to my son's teacher that we had a chewed up bag and that I would make a new one to replace it.  I ended up making a couple more for her as they were running short.

I used this quilt block pattern from Patchwork, Please! by Ayumi Takahashi.  I am not a quilter - I find it enormously challenging, but this book has the cutest, freshest little projects:  they are worth the extra effort I have to give to switch sewing gears and try to think like a quilter.

http://www.amazon.com/Patchwork-Please-Colorful-Projects-Stitch-ebook/dp/B00EVU3YR6/ref=la_B00AFEGPK0_1_1?s=books&ie=UTF8&qid=1393985630&sr=1-1 

The quilt block is a book (I thought that was fitting) with slightly flared pages and edge and corner bindings.  It is constructed using paper piecing which will give you excellent results.

Fabric choices are fun for this:
  • I love this blue-print style for the book cover - oh the wonderful things that books can teach us!
  • the stylized alphabet print was a fitting choice
  • The star border is a decorative stitch on my sewing machine


The backpack is a simple rectangle cut from linen fabric.  The top is turned down, leaving an opening in the seam allowance on both sides to thread the string through.  The corners have eyelets to attach and knot the ends of the string.


 This is an adorable quilt block.  I think it would be darling used in wall hangings or pillows, too.

Make something beautiful (and scholarly)!
Jen

Monday, March 3, 2014

Vikings and Chafing

Little known fact:  there are some little Vikings who have sensitive skin and are prone to chafing.  So what is the solution when rough seams are rubbing him the wrong way? 

I ran into some resistance from my son with his viking pj pants.  The seaming around the crotch and leg was bothering him, and he is intolerant to say the least.  He has terribly sensitive skin - prone to eczema and general irritation, so I've got a wonderful way to help him feel more comfortable in his clothes (this is helpful even for store bought clothes):  Dreamweave.

floriani dream weave ultra

I cut small, seam size strips of Dream Weave and fused it with my iron on the hottest steam setting and a wet press cloth.  It is also excellent for fusing over the back of embroidery on shirts to prevent itching/irritation as well.
Here are some photos to show how I applied it:


Now my son wears these as much as possible and is quite thrilled that they feel soft and chafe-free!

Make something beautiful (and chafe-free!)
Jen

Saturday, March 1, 2014

Sweet Snow Princess Doll

My son is completely enamored of Elsa, the beautiful ice queen in the movie Frozen. So when he came into my craft room and saw me begin working on this sweet doll pattern, he requested that I make her like Elsa.

The doll pattern is by Gingermelon.  It is the "Best Friends" pattern available in her Etsy shop.

Best Friends Doll pdf Pattern - Instant Download

The pattern is excellent.  Gingermelon's instructions are really flawless - even for a beginner.  The doll is sewn completely by hand.  It is excellent practice for perfecting hand stitches.  The stitches I used are:
  • Blanket stitch
  • Whip stitch
  • Ladder stitch
  • Satin stitch
  • Back stitch/outline stitch
  • Running stitch
Because she is small - about 10 inches high - she really doesn't take much time to sew.  I did this project over about 4-5 days, carving out little bits of time here and there.  I had my son do most of the stuffing - his little fingers are perfect for this work.


  • She's made entirely from wool blend felt that I purchased from Gingermelon as well - available in her Etsy shop.  It is beautiful and soft and the colors are extraordinary.
  • Most of the embroidery floss I used is 12 strand silk purchased at Peacock Alley Needlepoint in Ada, MI.


Design changes I made:
  • I made sleeves for the dress
  • I made sleeve trim, dress trim, and a collar (with a little bit of glitter to make them sparkle)
  • I embroidered the face:  eyes, nose, and mouth instead of the felt eyes
  • I added a flower with some seed beads in the center
  • I added seed beads to the bows on her shoes


So who is this doll really for?  Well she's for me, but right now she's snuggled up in bed with my son, next to the Superhero Flip Doll.


 Make something beautiful!
Jen