Tuesday, December 9, 2014

Christmas Corduroys Continued - Back Pockets and Top-Stitching Tips


Typical instructions for pant/jean construction have you start with pockets.  These tend for me to be some of the trickiest - especially when doing clever and interesting pockets with lots of top stitching.  They really show off your sewing skills (or lack thereof).

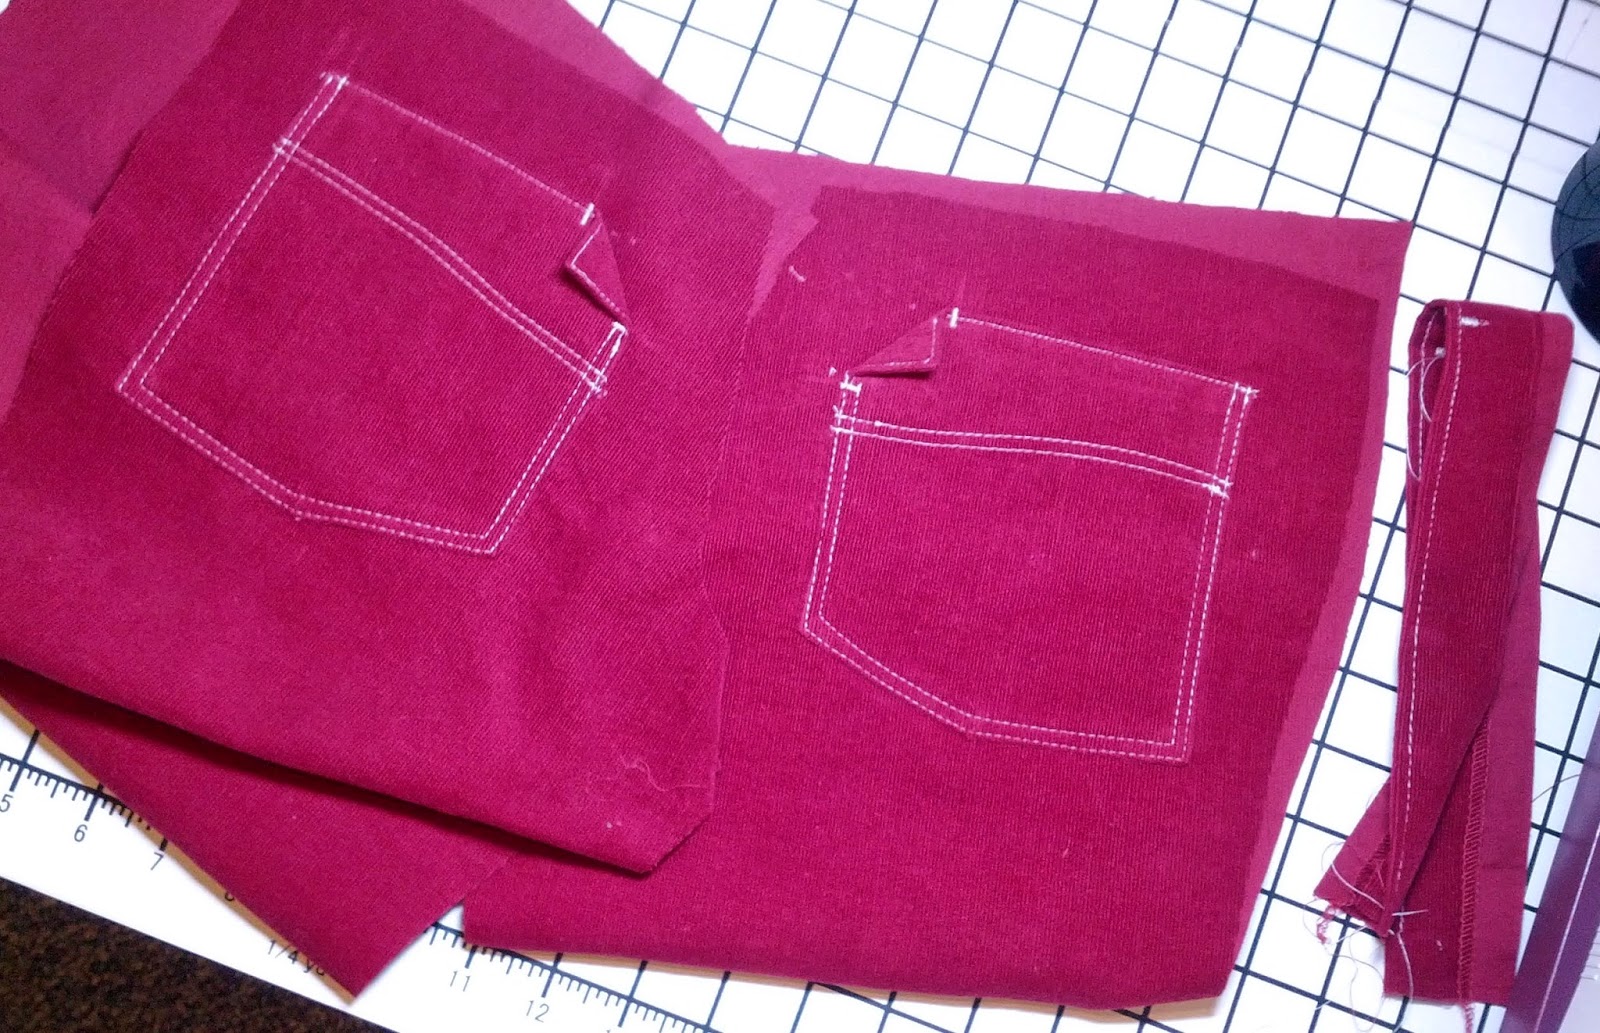
These back pockets took a bit of patience.  The top of the pattern piece is a curved line which becomes (when sewn and folded down) the guide mark to stitch the wavy/curved top stitching that goes diagonally across the pocket.


The top of the pocket is edge stitched (stitched very close to the edge) prior to attaching it to the pants back.  This can be tricking as some machines like to grab and pull the fabric down in the feed dogs.

To help make this go more smoothly, I use a "hump-jumper" which is simply a piece of fabric of like-thickness that I place under my machine foot and behind the starting point of where I want to stitch.  This keeps the foot level and keeps the fabric from getting pulled down into the bobbin and jammed.  You can see the strip of fabric I used in the picture below.


My next top-stitching best friend is my bi-level top stitch foot.  It has a groove underneath the foot that fits the edge of the fabric and guides it for a nice straight line.  I move my needle position to place the stitching exactly where I want it.  This is great for double stitching.  I set my first row of stitching needle position at 2mm and my second at 6mm.  A picture of the bi-level top stitch foot is below.


The folded corners will have a jean stud inserted - I'll put that process in the post when I do the fly and the jean button.

Also, I have a bar-tack stitch on my machine which I used to make the bar-tacks on either side of the folded corner.  You could easily do this adjusting the zig stitch on your machine.

Next up - front pockets.

Make something beautiful!
Jen

Thursday, December 4, 2014

Christmas Corduroys

After being a stay at home mom for 7 years, I am back to work full time - and have been for the last six months.  I love this new phase of my life, but it has left little time for sewing.  I have some New Year Resolutions regarding that, but that is for another post.

I usually have a plethora of Christmas projects and gifts to sew, but this year I simply do not have time.  I am, however, sewing one Christmas gift (well, two actually - it is an outfit) for my son - who, alas, is growing at an alarming rate and will soon be too large to sew the cute clothes in my favorite children's sewing magazine - Ottobre Design.

Ottobre hit it out of the park with cute boy designs in their latest issue.


 I am making my son the red corduroy jeans and chevron style multi-colored sweatshirt on pages 18-19.


The whole outfit is darling, but I especially love the corduroys.  The have a curved leg seam and some completely awesome back pockets - not to mention fabulous top stitching.  Ottobre designers are so very clever and creative.

I'm taking this project in steps - doing a little each night - so I don't end up in a panic on Christmas Eve.  I'm also taking notes and developing a plan to make me a more organized and effective sewer along the way.

Here's the pre-work that's been done:

  • Pre-washed and ironed fabric
  • traced pattern and added seam allowances
  • cut pattern out of fabric and added all markings
  • Threaded up serger and tested on fabric
  • threaded up sewing machine and wound bobbins of sewing thread and top stitching thread
  • Tested top stitch length setting (both cross-wise and length-wise as it will look different on the corduroy because of the nap)

I've noticed on ready-to-wear jeans that the top stitching is a much longer stitch length than the standard 2.5mm length that my home-ec teacher drilled into my head.  I decided that my favorite look is the 4.0mm length

Threads and bobbins ready to go! (This is a first for me).


 Serger threaded and tested! (I love this machine - it stitches perfectly all the time - she is also newly back from a tune up at the sewing store and in tip-top shape).  It is an oldie but goodie - a Viking Huskylock 1002LCD (it does the coverstitch too!). 

My sewing machine.  My previous machine I named Christine because it was possessed.  This one is my precious.  This is a Pfaff 2170.  It's also an oldie but goodie.  Not only does it sew beautifully and have 300+ decorative stitches, it also embroiders beautifully too.  I have reviewed this machine on patternreview.com in detail.  Click here


A view of my sewing area (so you cannot see the mess behind the camera).  Also that corner next to the sewing machine is where I take almost all the pictures for my blog :)

Tomorrow I start on the back pockets.

Make something beautiful.
Jen