Showing posts with label ottobre design. Show all posts

Friday, January 2, 2015

New Year's Corduroys

I want my sewing in 2015 to be prolific and productive.  I think each New Year of all the ways I'd like to change and improve and the list gets longer and longer until I realize it would really be impossible to achieve every single goal - there aren't enough hours in a day and frankly, the extra 10 pounds are worth the happiness of eating what I want.

I do, however, have one simple resolution for this year:  sew everyday.  No rules on how long or how much, just sew and do it daily.  My mind is brimming with what I want to accomplish:  a wardrobe of beautiful suits for work, gorgeous perfectly fitting designer jeans, my child in adorable, unique clothes, my husband in custom fit dress shirts, my home decorated with custom draperies, slipcovers, and hand embroidered pillows and wall hangings, craft more beautiful dolls.  No way can I possibly do all this.  But I can sew everyday and by doing so, I know that some of these will be accomplished.

I got a tool to help me with this:

http://fashionary.org/planner/

It's a smallish sized planner where I can write briefly what I sew each day and on the facing page there are blank lines for additional notes on the projects I'm sewing that week.

My side resolution is to participate in some form of sewing education each day.  That is: watching a video (I've got a whole bunch of classes I bought at Craftsy to keep me busy) or reading a sewing article (Threads magazine is excellent) or sewing book or book on fashion or fashion history.  I haven't placed time limits on this either - I think that is freeing.

If you haven't read The Artist's Way by Julia Cameron I highly recommend it. I think anyone - even those who don't think they are creative - can find benefit from part, if not all, of her book.  My goals for sewing are in part based on Ms. Cameron's techniques.  (Morning pages are one of the best disciplines and benefits of her method).

If you haven't clicked away from my blog yet, I will show you my progress for the first two days of January:

Rivets:

I think I mentioned in a prior post that I'd go into more detail with rivets - here you go.

First the Tools:


  • Hammer
  • Sample block of man-made "quartz" (I got this when we were remodeling our kitchen and choosing new countertops)
  • Rivet
  • Eyelet Cutter
  • Snippers (for cutting the base of the rivet) borrowed from my husband who has many tools for model rocketry that are quite useful for sewing.
Process:

  • Place the fabric on the quartz.  You could use something similarly hard - metal or other, but wood is too soft.
  • Use the eyelet cutter to punch a hole in the fabric for the rivet.  Position the cutter and gently tap a few times with the hammer.
  • Place bottom piece of rivet underneath and through the hole.
  • Then snip it down so it's only a smidge (that's technical) above the fabric (see below)
  • Place the top of the rivet over the bottom and gently hammer (with the quartz underneath)
  • Turn it over and hammer from the back side until it is securely set.
  • Voila!  Rivet!
I also sewed the back yokes on today.  Yesterday I did the front pockets.  Steps left:  Fly front/zipper, side and inseams, waistband and beltloops, front button and hemming.

Make something beautiful!
Jen


Tuesday, December 9, 2014

Christmas Corduroys Continued - Back Pockets and Top-Stitching Tips


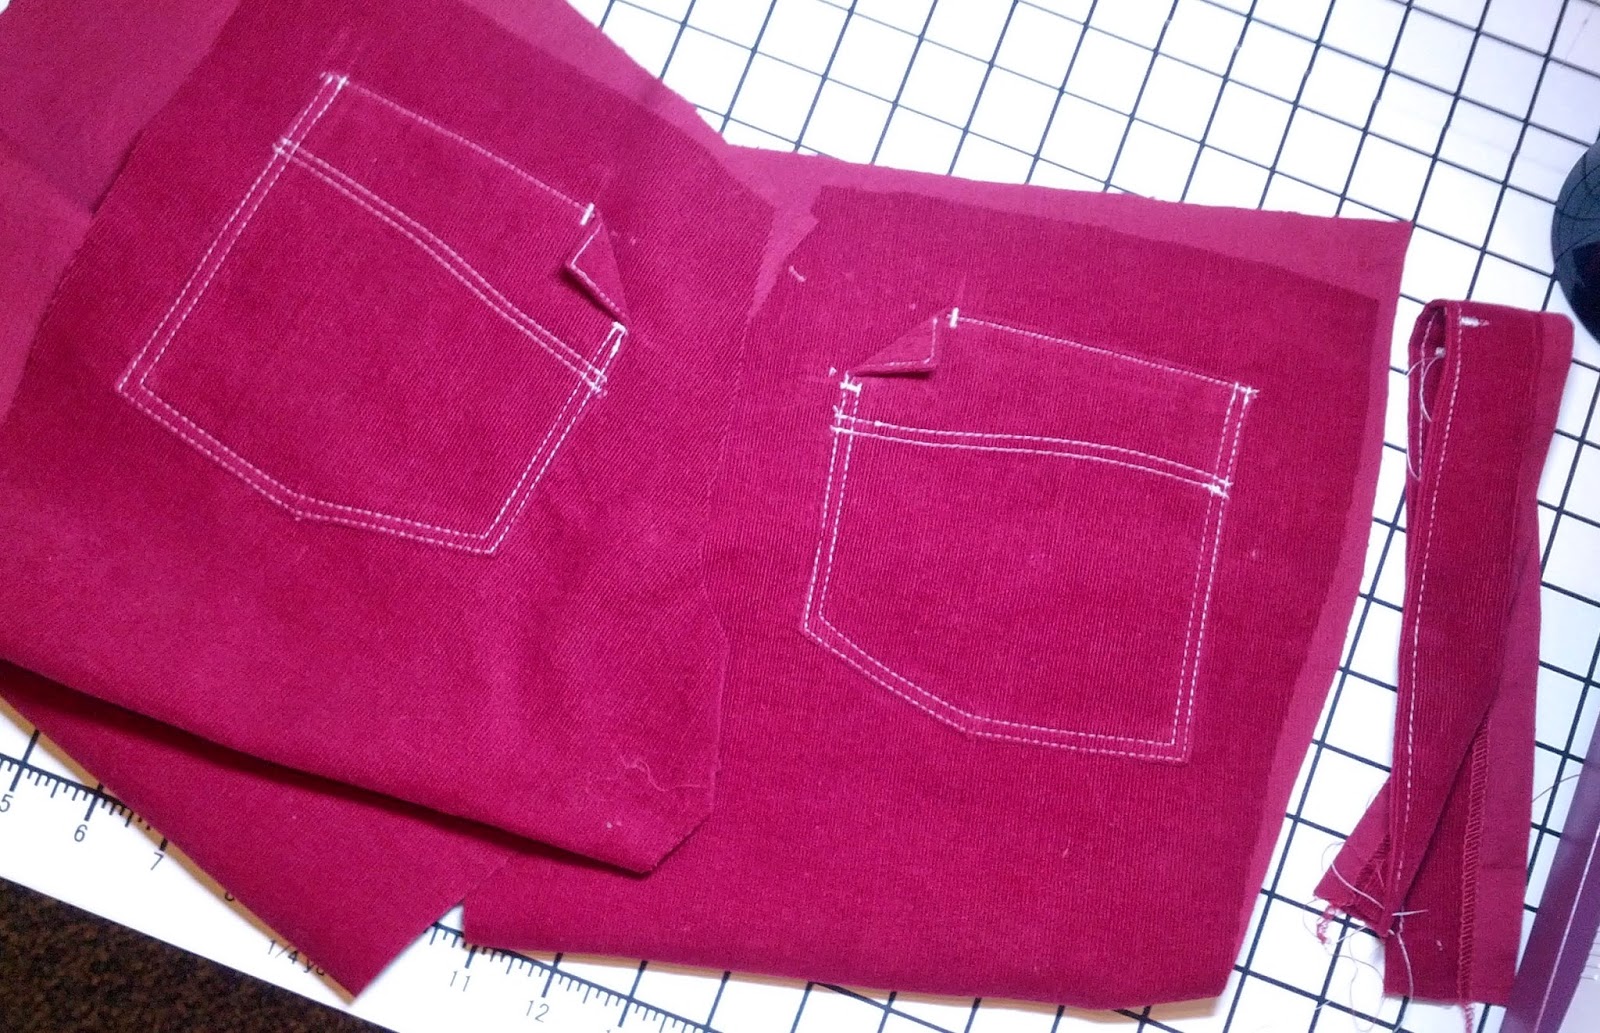
Typical instructions for pant/jean construction have you start with pockets.  These tend for me to be some of the trickiest - especially when doing clever and interesting pockets with lots of top stitching.  They really show off your sewing skills (or lack thereof).

These back pockets took a bit of patience.  The top of the pattern piece is a curved line which becomes (when sewn and folded down) the guide mark to stitch the wavy/curved top stitching that goes diagonally across the pocket.


The top of the pocket is edge stitched (stitched very close to the edge) prior to attaching it to the pants back.  This can be tricking as some machines like to grab and pull the fabric down in the feed dogs.

To help make this go more smoothly, I use a "hump-jumper" which is simply a piece of fabric of like-thickness that I place under my machine foot and behind the starting point of where I want to stitch.  This keeps the foot level and keeps the fabric from getting pulled down into the bobbin and jammed.  You can see the strip of fabric I used in the picture below.


My next top-stitching best friend is my bi-level top stitch foot.  It has a groove underneath the foot that fits the edge of the fabric and guides it for a nice straight line.  I move my needle position to place the stitching exactly where I want it.  This is great for double stitching.  I set my first row of stitching needle position at 2mm and my second at 6mm.  A picture of the bi-level top stitch foot is below.


The folded corners will have a jean stud inserted - I'll put that process in the post when I do the fly and the jean button.

Also, I have a bar-tack stitch on my machine which I used to make the bar-tacks on either side of the folded corner.  You could easily do this adjusting the zig stitch on your machine.

Next up - front pockets.

Make something beautiful!
Jen

Tuesday, February 18, 2014

Viking Pajamas

My son and I LOVE the How to Train Your Dragon series by Cressida Cowell.  They are marvelously fun and full of adventure.  They are also full of Vikings and Dragons.

When I saw this fabric by Lillestoff, I thought it would make a pair of pajamas perfect for a little boy to dream of magical dragons and adventures on the Viking seas.  It's also so cute I may have to make something for myself with it too.  It's available in Ottobre Design's Etsy Shop (click the picture), although I believe this particular colorway is sold out.

https://www.etsy.com/listing/116693801/vikings-organic-cotton-elastane-single 

I bought some blue and purple ribbing from Ottobre as well for the neckline and cuffs on the shirt, and also cuffs on the pants.


The shirt is going to be a solid dark navy cotton jersey with some Viking applique.
How do you do Viking applique?  Well...
  •  First I find a cute image of a Viking Dragon Ship on my Viking fabric


  • Then I trace it with some Swedish Tracing Paper (this is an essential supply for copying, tracing, and drafting patterns).

  • Then I enlarge it 200% on a copier


Now I have the proper size Viking Dragon Ship to make my applique.  I'll be dyeing and cutting up some of my husband's old T-shirts for the applique.  I'll post my progress on that soon.

Make something beautiful!  (or something with Vikings!)
Jen

Saturday, February 15, 2014

Sweet baby coat


This sweet baby coat is from the Ottobre Design 04-2010 issue.  If you're not familiar with Ottobre, they are hands down the cutest, trendiest, sweetest clothing patterns you can get if you sew for children.  They are also not overly slanted toward girls, which is important to me since I only have one boy and I love making him adorable clothes.

That being said, this jacket is for a precious baby girl.  I've made this pattern before and it's very cleverly designed and although it requires some skill (it's not a novice pattern), Ottobre's details make it look so very boutique and RTW.  It makes a very special gift.


I call this version the "Strawberry Coat"
  • I had this baby wale green corduroy in my stash.  It was my starting point.
  • I lined it with knit - it's surprisingly easy to make a lining out of knit and it is oh-so-soft for babies.  The knit is 100% organic cotton jersey - it's from Heather Ross's Briar Rose fabric line, called unsurprisingly: strawberry
  • The beautiful pink and red rib knit is purchased from Ottobre Design's Esty shop.  It's divine.  You won't find anything like it anywhere else.  Worth the price and the 3 weeks it takes to arrive from Finland.
  • The strawberry buttons are JHB, I think - I bought them at my local fabric store.

What I love about this coat's design:
  • The hood!  It has an invisible zipper down the center that forms a darling wide collar when unzipped.  It also has elastic sewn around the front edges that frame sweet baby's face beautifully.
  • The pockets!  They are so cute - round little pockets gathered with rib knit trim.


If you want to try making this sweet jacket and want more tips, visit PatternReview and my original review from 2010 - I have some construction tips there that may be helpful.

Skills needed:
  • sewing curved seams, clipping seams
  • topstitching
  • putting in an invisible zipper
  • inserting elastic
  • inserting a lining
  • sewing with knits
  • attaching snaps

I have a Pfaff 2170 sewing embroidery machine, which I used to make this cute label.  The strawberry embroidery design is from Urban Threads.

Make something beautiful!
Jen