Showing posts with label handmade doll. Show all posts

Sunday, March 20, 2016

Still Sewing

Still sewing - not much time to tell about it.

Since my last post I've completed an Elizabethan Jacket for my sister's Mardi Gras costume, a quilted zip around pocket organizer (which I hate and gave away), lots of sachets (Christmas gifts), 4 Roman shades for my living room, repeated repairs to my sofa slipcovers (due to puppy), a gorgeous pair of retro satin pajamas and more I can't remember. 

What motivated me to post, however, is starting (actually re-starting) another doll.  This one is a vintage pattern - 1930s or 1940s I think - called "Rainy Day Girl." She's got the beautiful sculpted head like other dolls I've made.  I started her about 2 years ago and she's been sitting one-eyed in a coffee mug by sewing machine ever since.


My son has voiced his concern over the creep factor.  I finally picked her back up today, the goal being to give her a second eye.

I love sewing - most every kind of sewing - but there is something about making a doll that is more.  I love the hand work.  It's very slow (2nd eye took a little less than an hour) but I never feel anxious or bored or like I need to move on.  It's a creation that's different from clothes or crafts or window treatments.

I keep the doll in my lap while I stitch.  I think it's lovely and I get very attached to it as it begins to take shape.  I did look down at one point, though, and think it must look a little Franken-creepy to an observer.  See photo below:


 I don't think I've done a very detailed post on embroidering doll faces yet - I'd point you to Jill Haymor's Storybook Toys book first, but here are a couple tips:

  • Mark your facial features with water-soluble marker
  • Cut a much longer length of embroidery thread than you'll think you'll need
  • Use one strand - it gives you better control and detail even though it takes longer
  • Use a doll needle (big, long 2 or 3 inch needle) to bring it through the back of the head to ear.
  • Sew a tack stitch at the ear and then bring through to the face.  Switch to your embroidery needle.
  • Be careful to stop embroidering while you still have a long enough length of floss to finish through the ear and back of the head like you started.
  • Pull up slightly on the threads at the back of the head and snip them flush.  They'll disappear into the doll.
Now, sweet Agatha (yes, she's got a name now) has to lovely pale blue eyes with flecks of gold.  Pupils to come.


Make something beautiful!
Jen

Saturday, April 5, 2014

More Doll Making Adventures

I am so inspired by the projects in the book, Storybook Toys by Jill Hamor.  I'm planning all sorts of dolls and other toys from this amazing book.
I am working on a few things to send to my niece, Anastasia, who just turned one.  She's my only niece on my side, so that makes her extremely special.

Here is the doll I am working on for her.  I went for a more Japanese cuteness style - which I love.  The pinky-lavender hair is soooo pretty and sweet.  I did a low bun hair style - reminiscent of Princess Leia (a special sci-fi detail my brother will appreciate).  The eyes are solid black instead of colored irises for a more stylized, cartoonish look. 


Once the head/body is sewn and stuffed, face embroidered, and hair completed the doll is really about 80 percent complete.  Of all these steps the hair takes me the longest (4-6 hours) and hurts my fingers the most.  I have some excellent callouses building up on the tips of my pointer and middle finger in my right hand (I prefer the callous to thimbles - I hate thimbles:  fumbling awkward horrible things).


 I love working with yarn for hair.  I can't knit or crochet so this fulfills my desire to play with beautiful yarns and squish those pretty soft yarn balls.  This yarn is Rowan Creative Focus Worsted, 75% wool, 25% alpaca.  The color is called "soft pink."


Make something beautiful!
Jen


Saturday, March 1, 2014

Sweet Snow Princess Doll

My son is completely enamored of Elsa, the beautiful ice queen in the movie Frozen. So when he came into my craft room and saw me begin working on this sweet doll pattern, he requested that I make her like Elsa.

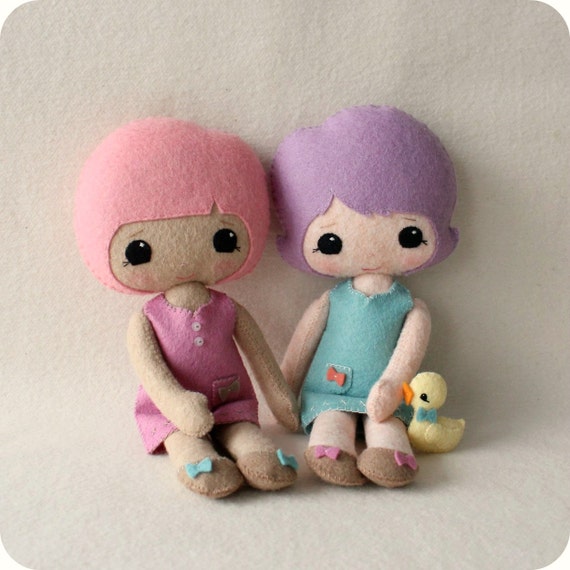
The doll pattern is by Gingermelon.  It is the "Best Friends" pattern available in her Etsy shop.

Best Friends Doll pdf Pattern - Instant Download

The pattern is excellent.  Gingermelon's instructions are really flawless - even for a beginner.  The doll is sewn completely by hand.  It is excellent practice for perfecting hand stitches.  The stitches I used are:
  • Blanket stitch
  • Whip stitch
  • Ladder stitch
  • Satin stitch
  • Back stitch/outline stitch
  • Running stitch
Because she is small - about 10 inches high - she really doesn't take much time to sew.  I did this project over about 4-5 days, carving out little bits of time here and there.  I had my son do most of the stuffing - his little fingers are perfect for this work.


  • She's made entirely from wool blend felt that I purchased from Gingermelon as well - available in her Etsy shop.  It is beautiful and soft and the colors are extraordinary.
  • Most of the embroidery floss I used is 12 strand silk purchased at Peacock Alley Needlepoint in Ada, MI.


Design changes I made:
  • I made sleeves for the dress
  • I made sleeve trim, dress trim, and a collar (with a little bit of glitter to make them sparkle)
  • I embroidered the face:  eyes, nose, and mouth instead of the felt eyes
  • I added a flower with some seed beads in the center
  • I added seed beads to the bows on her shoes


So who is this doll really for?  Well she's for me, but right now she's snuggled up in bed with my son, next to the Superhero Flip Doll.


 Make something beautiful!
Jen